








































Patient Portal
Your results and images, in one secure place. The Midwest Radiology Patient Portal lets you view your recent results and images, keep track of upcoming appointments, and read the letters that explain your screening anytime, from your phone or computer.
Access is by invitation. After your visit, we'll send you a link to register. Once you're set up, just log in below.
For technical assistance with the portal, call 763.792.1973.
Patient Portal Guide
Registering for the Patient Portal
Patients must first register to use the patient portal before they can access appointments, results, and other portal functions. An email will be sent inviting the patient to register to use the portal. To register, follow the steps below:
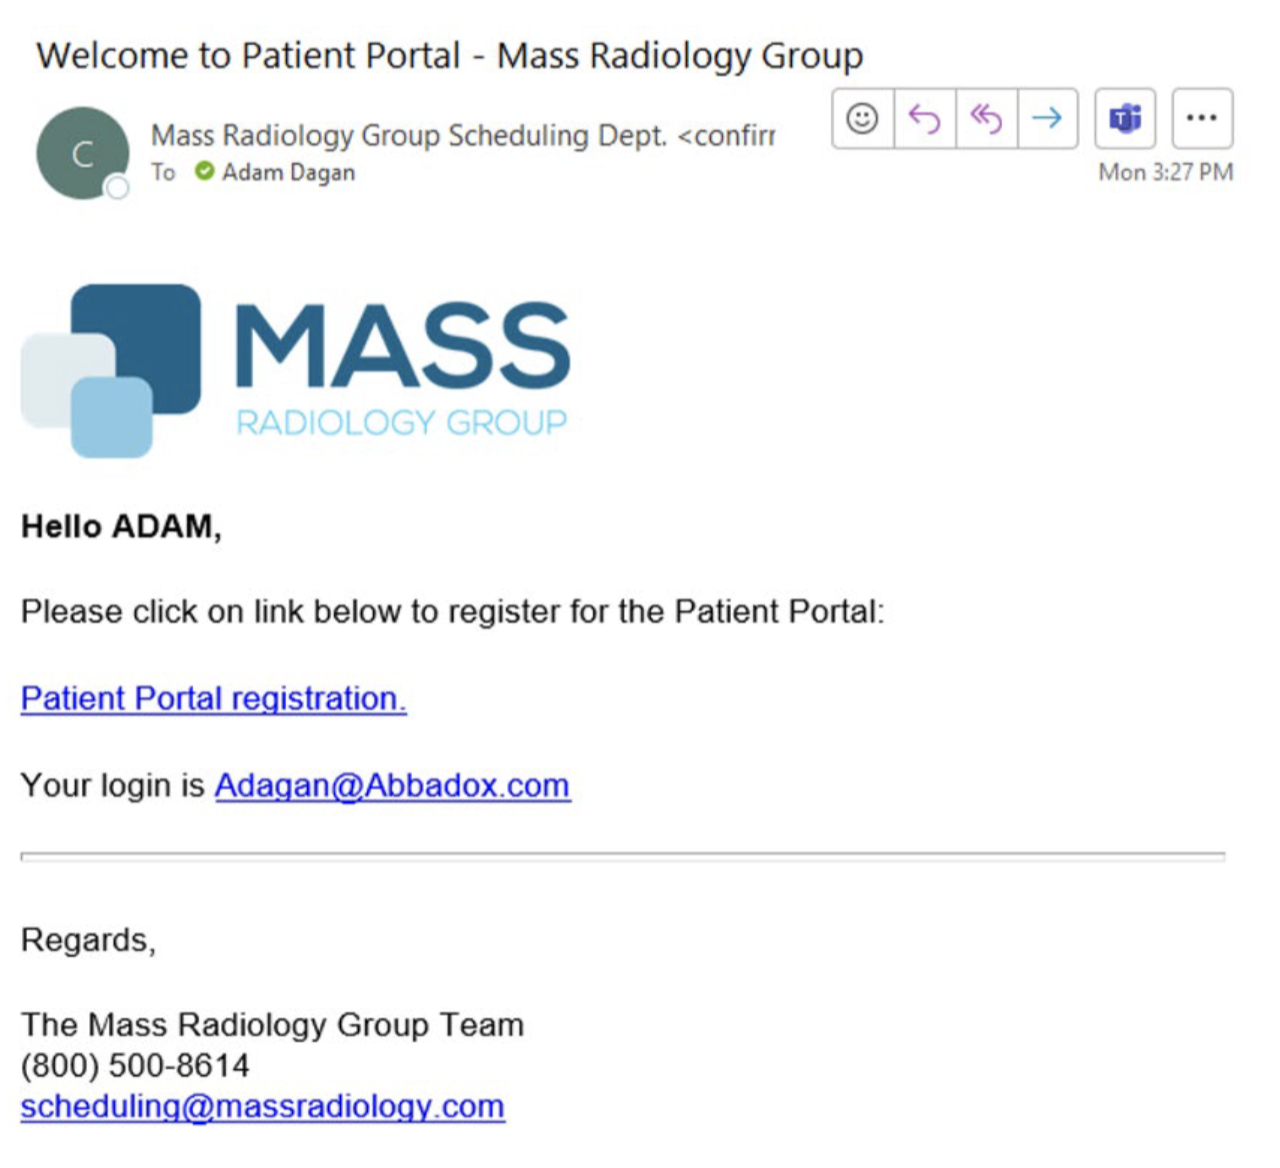
- Click the Patient Portal registration link in the email.
- Enter a password and answer 3 security questions.
- Click Sign Up.
- Log in with your new credentials.
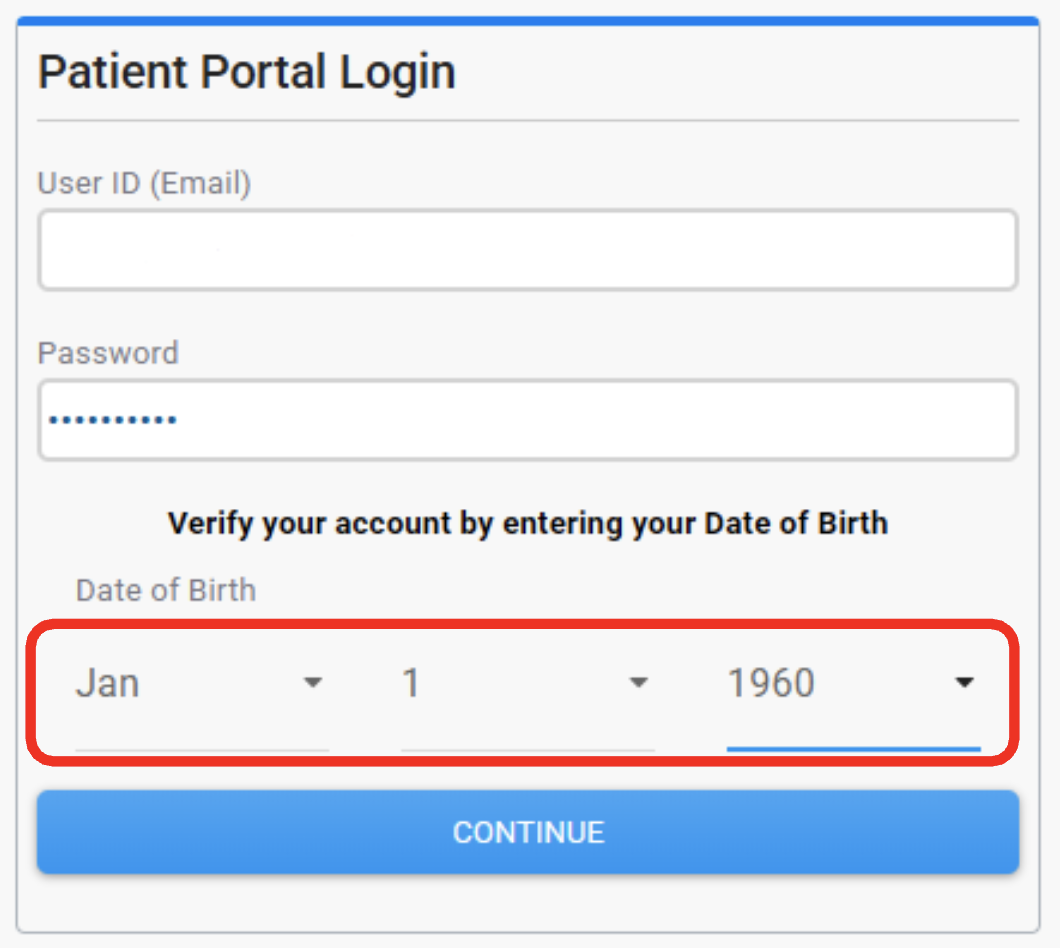
- Enter your birth date and click Continue to verify your account.
- Click Accept to agree to the terms of user agreement. The patient portal will appear.
Log In to Patient Portal
After registering for the patient portal, future result text message notifications will include a link to the patient portal where patients can log in to view details of their appointments, view past results and perform other functions.
To log in to the patient portal, follow the steps below:
- Click the URL in the text message.
- Enter your User ID (email) and Password.
- Click Login.
Note: Only one patient can be registered per email address.
Navigating the Patient Portal
The patient portal provides access to Results, Images, Appointments and Lay Letters.
Results
The Results component displays reports for previous appointments.
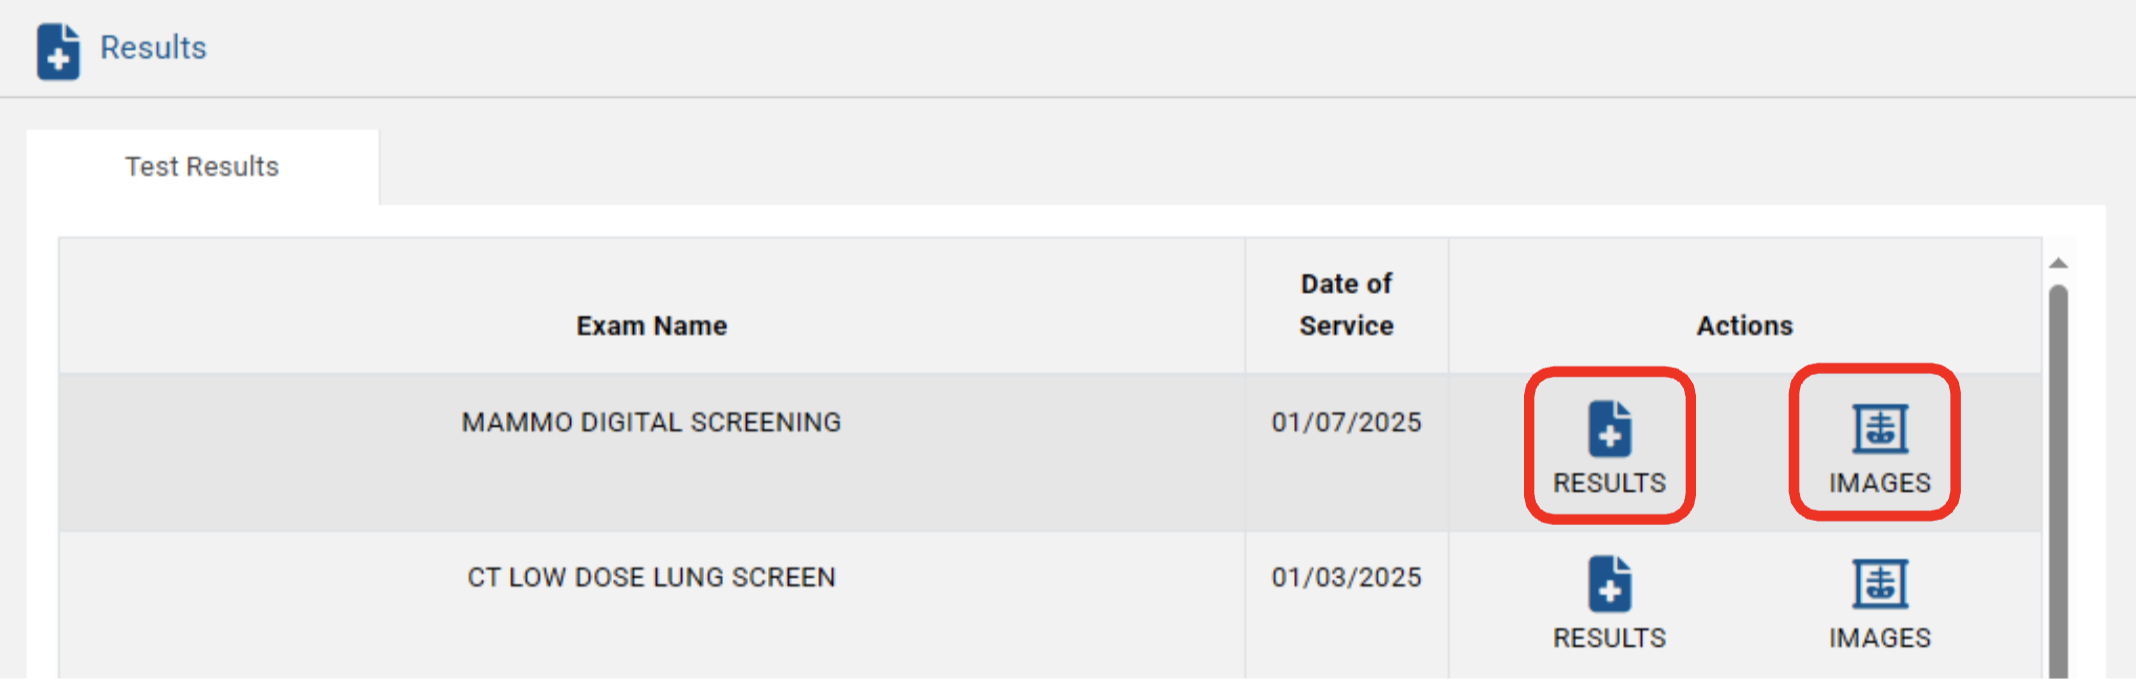
Click Results next to an appointment to view the report. The report will open in a new window. You can print the report if you are connected to a printer.
Click Images next to an appointment to view the study. There might be a slight delay for the images to load. If they do not load on the first attempt, close the viewer tab and click the Images link again.
Note: If attempting to view Images from Safari on an iOS device, open Settings and search for “Safari” and toggle Block Pop-ups to off.
Appointments
The Appointments component is the default landing page users see after logging in. This page displays upcoming appointments, unscheduled appointments, and allows you to self-schedule select exams.
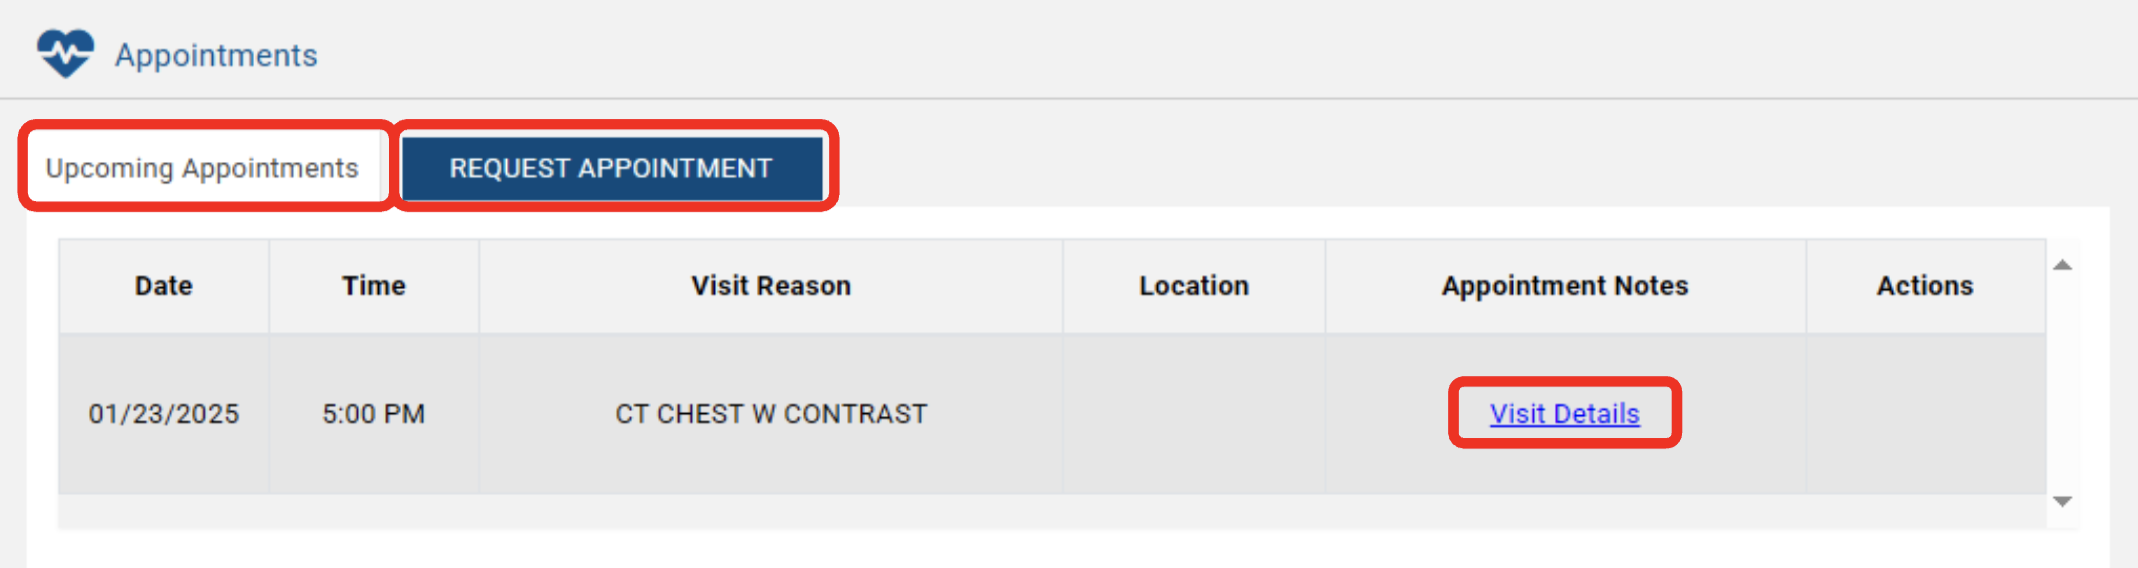
Upcoming Appointments
Click Visit Details to view appointment information and prep instructions.
Request Appointment
You may self-schedule some exams from the patient portal, to do this:
- Click Request Appointment to open the Scheduler Wizard.
- Fill out the required details and follow the onscreen prompts to verify your information and choose the location, date and time to have your exam.
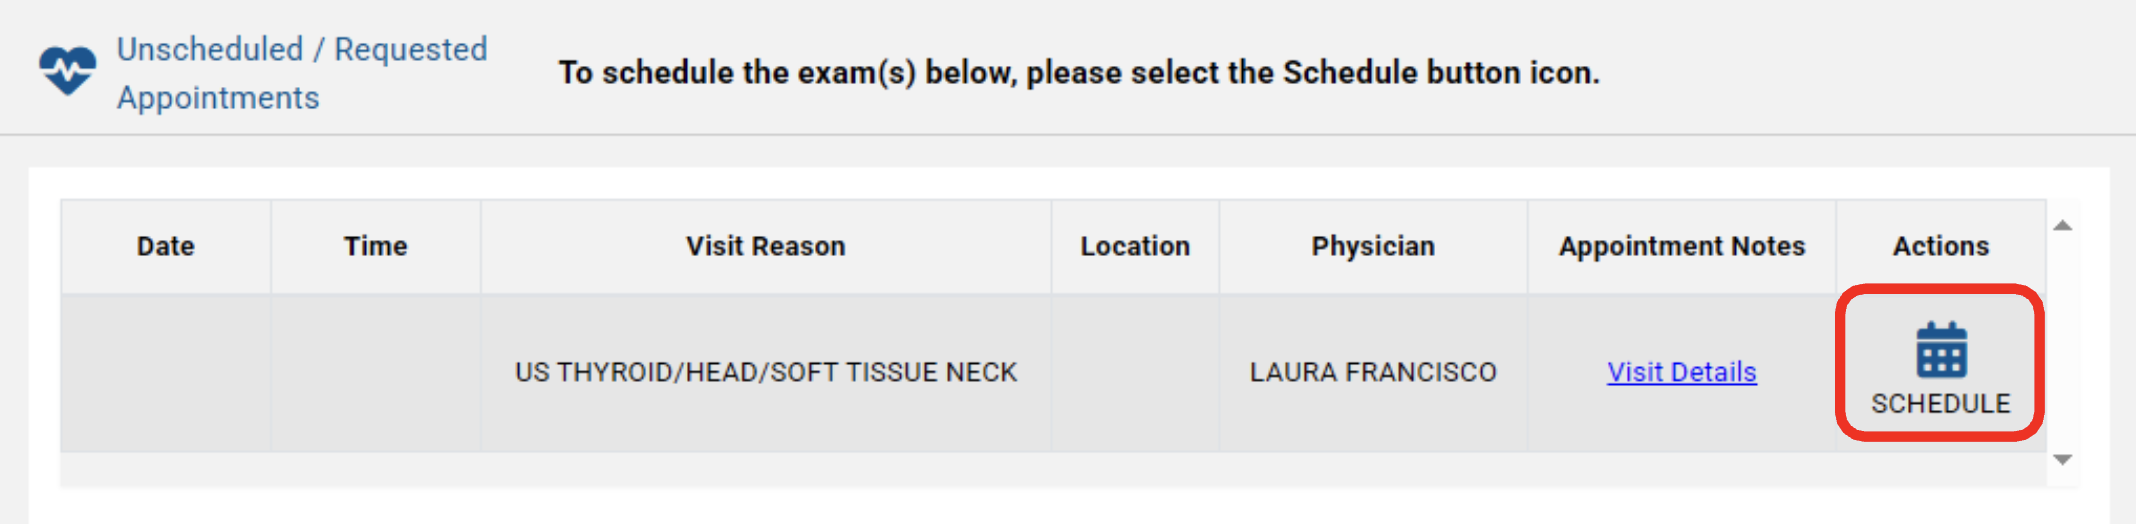
Unscheduled / Requested Appointments
- If your physician has sent an order that can be self-scheduled, you will see it listed here.
- Click Schedule to open the Scheduler Wizard and follow the onscreen prompts to verify your information and choose a location, date and time to have your exam.
Letters
The Letters component displays lay letters for Mammogram and CT Low Dose Screening exams.

Click View Letter next to an exam to view the lay letter. The letter will open in a new window. You can print the letter if you are connected to a printer.